“Drone photography is just pressing ‘record’ from the sky and letting the tech do the magic.”
That sounds nice, but it is false. Very false. Drone photography is still photography. The drone only changes your point of view. If you approach it as a shortcut, your shots will look random and flat. If you treat it like a camera that happens to fly, you can create scenes that hold attention and keep people on your site, your feed, or your portfolio longer than you expect.
I might be wrong, but it seems to me most beginners struggle not with flying the drone, but with thinking like a photographer while flying it. The tech keeps getting better. The skills often do not keep up. So this guide will walk you through the mental side and the basic technical side, step by step, without assuming you want to be a Hollywood pilot.
The goal: you should finish reading with a simple plan. What drone to pick. How to fly it safely. How to get clean, sharp, deliberate images. And how to avoid the legal mistakes that can ruin your day faster than a lost signal.
“If the drone has a good camera, the photos will be good.”
That belief is what causes people to spend money on a high-end drone, then post dull, tilted horizon shots that nobody remembers. A strong camera helps, yes. But light, timing, angle, and composition still matter more than sensor size. Even a compact drone can create strong work if the person behind it knows what they are doing. So we will focus more on skill than on gear hype.
Another common belief is:
“I will learn the rules later; I just want to try flying first.”
This is risky. Not only for safety. For your wallet and your record too. Drone laws are not just for professionals. They apply to you, the hobbyist, the traveler, the parent with a drone at the beach. I will walk through the boring parts in plain language so you can fly without anxiety in the back of your mind.
One more:
“Drone photos all look the same: straight down, tiny people, teal water.”
That trend exists. But you do not have to follow it. With a few simple adjustments, you can build a style that feels like yours, even as a beginner. Angle changes, simple editing, and stronger stories help you avoid the copy-paste look that fills social feeds.
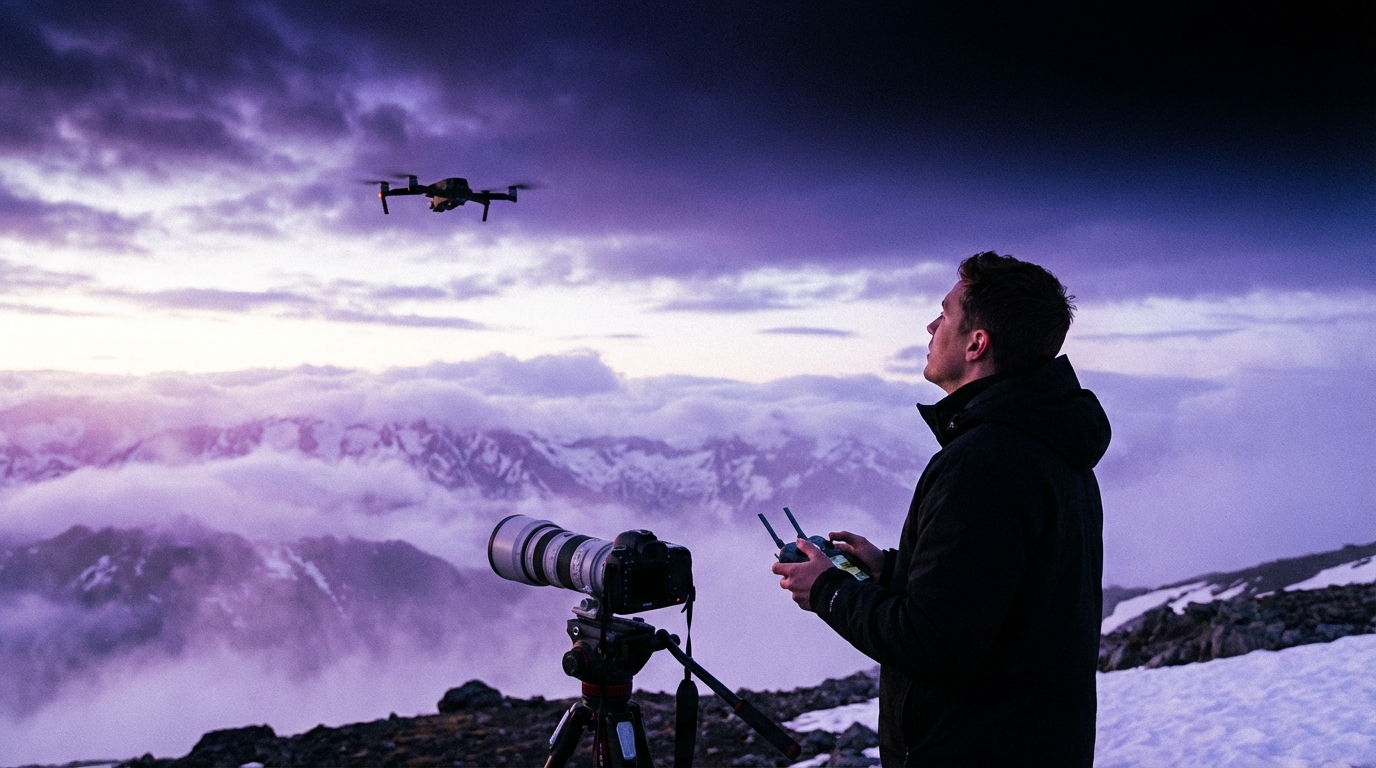
Let us start where most people skip: the mental shift from “flying toy” to “flying camera.”
Thinking like a photographer, not a pilot
Most new drone owners obsess over range, battery life, and height. Those matter. Still, great images usually stay within a few hundred meters, often even closer. Some of the most engaging drone photos sit well under the legal height limit and feel almost like they were shot from a balcony.
So when you hold the controller, ask first: “What story am I trying to show?”
That might sound heavy, but it can be simple:
– A quiet street pattern at sunrise.
– Lines of waves hitting a pier.
– People moving through a market.
– Contrast of a single red roof in a sea of gray.
You are not just capturing “a town from above.” You are looking for a shape, a contrast, or an emotion that stands out.
Some questions to keep in your head while you fly:
– What is the main subject in this scene?
– Where are the strongest lines or shapes?
– What height gives the subject the right weight in the frame?
– Is the light helping the shapes or flattening them?
Even small changes in height or angle can turn a flat image into something that catches the eye. Many beginners always shoot straight down or straight forward. Try to work through a few angles on every flight: low-forward, medium tilt, straight down, then back up with a different direction.
You will start to see patterns in what works.
Understanding the basic drone types for photography
I will be direct here: for photography, you do not need a heavy, high-speed racing drone. You need a stable, GPS-supported camera drone with gimbal stabilization.
Most beginner-friendly drones for photography fall into three buckets.
| Type | Pros | Cons | Best for |
|---|---|---|---|
| Mini / sub-250g drones | Light, often easier legal rules, good image quality in daylight, very portable | Weaker performance in wind, smaller sensor, low-light quality not as strong | Travel, hiking, casual city shooting where size matters |
| Standard camera drones | Better sensors, more stable in wind, more manual control, stronger image quality overall | Heavier, stricter rules in some regions, higher cost | Content creators, real estate, more serious photography work |
| Cinema / professional rigs | Top-tier image quality, often interchangeable lenses, large sensors | High cost, complex regulations, steeper learning curve | Film work, commercial jobs with larger budgets |
If you are a true beginner, I would not recommend jumping straight to a cinema rig. A compact mini or standard drone is more than enough to learn composition, light, and basic flying. You can always upgrade later when your skills and needs grow.
Key features that matter for beginners
When you look at drone specs, marketing material will shout about range and top speed. For photography, your focus should be different.
Here are the features that matter most for beginners:
1. A good 3-axis gimbal
This keeps the camera stable while the drone moves. Without it, your photos will blur or tilt. Almost all camera drones have this now, but check before you buy.
2. Sensor size and resolution
More megapixels help you crop, but they are not everything. Sensor size affects how the drone handles low light and dynamic range. For a start, almost any recent mini drone is fine for daylight. If you plan to take more serious shots at sunset, a larger sensor drone helps.
3. Flight time
Longer flight time gives you breathing room to try angles without rushing. Something around 25 to 30 minutes per battery is a good target.
4. Safety features
Obstacle sensors, return-to-home, geofencing warnings. These do not replace good judgment. They do make early flights less stressful.
5. Manual camera controls
You want the ability to set shutter speed, ISO, and white balance. Even as a beginner, you will soon feel the limits of full auto.
If a drone has a strong camera, but the interface feels clumsy or fragile, you will fly it less. Look for a balance of image quality, ease of use, and portability that fits your life.
Drone laws and rules: the part most people skip
This is where many beginners are simply wrong in their approach. They buy a drone, charge the batteries, and fly in the nearest open area. No research, no registration, no idea of airspace.
In many countries, that can lead to fines, confiscation of gear, or more serious problems.
I cannot give legal advice, and I cannot cover every region. Still, I can give a structure so you do not skip this step.
Quick rule checklist before your first flight
Here is a simple table you can use as a mental checklist. Check your local authority sites and fill these from official sources, not from random social posts.
| Topic | Question | Where to check |
|---|---|---|
| Registration | Do I need to register the drone or myself as an operator? | National aviation authority website |
| Weight class | Which rules apply to my drone’s weight? | Drone rules section on authority website |
| License / test | Do I need to pass a basic test or get a certificate? | Online portals by official regulators |
| No-fly zones | Where are airports, prisons, or restricted sites near me? | Official drone map or aviation map, regulator apps |
| Height limit | What is the maximum legal flight height in my area? | Regulation documents, FAQ pages |
| People & privacy | Can I fly over crowds or near homes? What about recording people? | Local privacy laws, aviation rules on flying over people |
| Commercial work | Do rules change if I sell the photos or use them for business? | Business section of drone rules, local business regulators |
The bad approach is to trust only the drone app for all legal guidance. The app may warn you about some special areas, but it does not replace reading your country’s regulations.
Basic safety habits that protect you and your footage
Some simple habits go a long way:
– Keep line of sight.
Do not fly so far that you lose sight of the drone with your eyes. If you cannot see it, you cannot judge distance to obstacles accurately.
– Respect distance from people.
Avoid flying close over strangers, crowds, or private homes. Even if some regions allow it with rules, people often feel uneasy. That can create conflict.
– Watch the weather.
Strong wind, rain, fog, and extreme cold can all cause problems. Wind at height can be stronger than at the ground. Learn how your drone behaves in different conditions before pushing limits.
– Battery discipline.
Never fly down to zero. Return home with a safety buffer, especially over water or trees.
If this sounds restrictive, think of it as a way to protect your chance to keep flying. One mistake near an airport or a sensitive site can trigger more rules for everyone.
Basic flight skills for photography
Flying for fun and flying for photography feel different. For photos, you want smooth, controlled movements and predictable framing.
I suggest practicing in three stages: ground drills, orientation, and smooth paths.
Stage 1: Ground drills without recording
Find a legal open area, away from people and buildings. Keep the drone close and low. Do not worry about recording at first.
Practice:
1. Takeoff and landing
– Take off to 2-3 meters.
– Hover for 20-30 seconds.
– Land gently.
Repeat until it feels plain.
2. Small box pattern
– Fly forward a few meters, stop.
– Move right, stop.
– Backward, stop.
– Left, stop.
Keep the drone facing one direction.
3. Slow rotations
– Hover and slowly rotate the drone 360 degrees.
– Try to stay at the same height and place.
This might feel boring. That is fine. You are building control so you can focus on the camera later.
Stage 2: Orientation practice
One common beginner problem is confusion when the drone faces toward you. Left and right inputs feel reversed.
Practice:
– Fly the drone a short distance away, then rotate so the camera faces you.
– Gently move left and right, forward and backward, until your hands start to adjust.
– Do not fly far until this feels safe.
This small skill removes a lot of panic when something goes wrong and you need to bring the drone home quickly.
Stage 3: Smooth paths for cinematic moves
Once you are comfortable, begin to practice smooth arcs and gentle climbs. These help both photos and video.
– Fly forward while slowly rising.
– Fly sideways while rotating gently to keep a subject in the frame.
– Practice stopping gradually, not in abrupt jerks.
Even for still photos, smooth control helps you line up your shot exactly instead of overshooting the angle.
Camera basics for drone photography
Drone cameras follow the same rules as normal cameras: exposure, focus, and color. The difference is that everything happens at a distance.
If you rely on auto mode all the time, your images will often be usable but inconsistent. Colors shift. Bright parts clip. Shadows turn too dark.
Let us walk through the essentials without going into heavy jargon.
Exposure: shutter speed, ISO, and aperture
Most compact drone cameras have a fixed aperture. That leaves you mainly with shutter speed and ISO to adjust.
– Shutter speed: how long the sensor sees light. Shorter times freeze motion. Longer times introduce blur.
– ISO: how sensitive the sensor is to light. Higher ISO brightens the image but introduces noise.
For photos, a simple starting point:
– Try to keep shutter speed above 1/200s if possible, to avoid motion blur from the drone’s movement.
– Keep ISO as low as you can while maintaining proper brightness.
Many drones have an “auto with exposure compensation” mode. That lets you bias the exposure darker or brighter while the camera picks the exact numbers. If full manual feels too heavy, start with this: set auto exposure, then adjust exposure compensation to avoid blown-out skies.
White balance
If white balance changes from shot to shot, your images will not match in color. For single photos, that might not matter much. For a series or a gallery, it looks messy.
Set white balance to a fixed mode based on the light:
– “Sunny” during bright midday.
– “Cloudy” on overcast days.
– A manual Kelvin value if you are comfortable with that.
Avoid leaving it on full auto once you start to care about consistent color.
Focus and sharpness
Most drone cameras focus almost everything in the frame, especially when shooting wide scenes. Still, check that the focus indicator locks where you expect, especially at night or over water.
Zoom features can be useful, but digital zoom often reduces quality. Use it sparingly. Move the drone closer when possible instead of relying on zoom for every shot.
Composition from the sky
Composition is where drone photography becomes interesting. The aerial point of view reveals patterns that you rarely see from the ground.
I might be wrong, but many beginners only think “higher.” They push to maximum height and shoot straight down. That works in some cases, but strong composition often lives at intermediate heights.
Common aerial composition patterns
You do not need to copy every “rule,” but some patterns help your images feel more intentional.
| Pattern | How to use it | What to watch for |
|---|---|---|
| Leading lines | Use roads, rivers, piers, or paths to guide the eye toward your subject. | Keep the main line entering from a corner or edge, not dead center. |
| Symmetry | Center the frame on a building, island, or object with balanced sides. | Check that the horizon is truly straight; tiny tilts show up strongly. |
| Rule of thirds | Place the horizon or main subject on one of the grid lines. | Avoid always centering everything; use the grid overlay if your drone offers it. |
| Patterns & textures | Look for repeating elements: fields, waves, trees, roofs. | Add a point of contrast (a person, car, or tree) to break the pattern. |
| Scale contrast | Include something familiar (a person, boat, car) to show size. | Keep the subject clear enough to read at small social media sizes. |
Choosing height and angle
Instead of flying to one height and staying there, treat height as a creative choice.
Ask:
– What happens if I fly lower, almost like a crane shot?
– How does the scene feel at half the legal height limit versus near the top?
– Does a straight-down “top-down” angle reveal patterns, or does it just flatten everything?
You can test this on a single subject. For example, a small pier:
– Start low, looking forward slightly above the pier.
– Climb to 20-30 meters, tilt the camera down a bit.
– Climb higher and try straight down.
– Rotate around the pier at different heights.
You will notice very quickly how the same place changes feeling with angle. Over time, you will learn to “see” the final frame before you move the drone.
Using light and time of day
Light affects drone photos even more than ground shots, because you often capture wide scenes with bright skies and dark ground.
Three times of day often work well:
– Early morning: softer light, long shadows, fewer people.
– Late afternoon / golden hour: warm tones, strong contrast lines.
– Blue hour: just after sunset or before sunrise, with a deep sky and artificial lights starting to glow.
Midday light can still work, especially for clear graphic top-down shots of beaches, pools, or streets. The shadows are smaller, so shapes feel cleaner.
Ask yourself:
– Where is the sun relative to my subject? Behind me, in front, or to the side?
– Are shadows helping define the shape, or hiding it?
– Would this scene look better five hours earlier or later?
Sometimes the correct answer is to not fly at that moment and come back later. That can feel annoying, but it often gives better results than fighting harsh light.
Practical shooting workflow
Let us put it all together into a simple practical flow you can follow each time you go out to shoot.
Before you leave home
– Check the weather forecast and wind for your location.
– Confirm that the location is legal to fly in your country or region.
– Charge all batteries and your controller / phone.
– Format your memory card after backing up older footage.
– Pack spare propellers, cables, and at least one extra battery.
On location: pre-flight
– Walk the area first. Look for people, trees, wires, and possible interference sources.
– Pick a clear takeoff and landing spot.
– Turn on the drone and controller, wait for GPS lock if your drone uses it.
– Confirm you are not in a restricted zone on the map inside the app.
Set your camera basics before taking off:
– Shooting mode: RAW + JPEG if possible. RAW gives more room for editing.
– White balance: fixed setting based on the light.
– Exposure mode: start with auto plus exposure compensation, or a semi-manual mode.
– Grid lines: turn on the rule-of-thirds grid to help framing.
During flight: work in passes
Rather than moving randomly, work in “passes” over the scene.
1. Scouting pass
– Fly to a modest height, maybe half your legal limit.
– Slowly circle the area to spot interesting shapes, lines, or colors.
– Do not worry about taking many photos yet.
2. First capture pass
– Pick 2-3 promising viewpoints.
– Fly to each, line up the composition, and shoot several frames at small exposure variations.
– Hints: Slightly underexpose when in doubt, to protect the sky.
3. Detail pass
– Drop lower where it is safe.
– Look for closer elements: boats, people, patterns on the ground.
– Shoot both wide views and tighter crops.
4. Safety buffer
– Return before your battery warning reaches a stressful level.
– Land with a cushion of power, not at the last minute.
You might be tempted to try many random shots on your first flights. Instead, limit yourself to a small number of focused compositions. Quality over quantity leads to faster progress.
Editing drone photos
Even simple editing can improve drone photos a lot. You do not need complex software at first. Mobile apps or basic desktop tools handle most needs.
Key areas to adjust:
– Exposure and contrast
Lift shadows a bit if they are too dark, but do not flatten everything. Keep some depth.
– Highlights and sky
If the sky looks dull or washed out, reduce highlights and add a bit of clarity, but avoid heavy halos around buildings or trees.
– White balance and color
Correct any strong color cast. Slight warmth during golden hour often looks pleasant, but do not force orange tones into every image.
– Straighten and crop
Make sure horizons are level. Crop to strengthen the main subject and remove distractions at the edges.
– Sharpening and noise
Add moderate sharpening and noise reduction. Too much will make the image look artificial.
It is easy to fall into heavy filters that push saturation and contrast to extremes. That might grab quick attention, yet it can also date your images quickly. Aim for a clear, natural look first. You can always stylize more later when you understand your preferences.
Common beginner mistakes to avoid
You asked to be told when you are wrong or moving in a bad direction, so let me be direct about behaviors that hold beginners back.
Relying only on the highest altitude
If your plan is “I will just fly as high as allowed and shoot from there,” your photos will almost always feel distant and generic. High shots can work, but without a clear subject or pattern, they turn into wide, unremarkable views.
Change of habit: spend at least half of each flight at low or medium heights, deliberately exploring angles.
Ignoring the foreground
Many drone photos show a big distant subject but no context near the camera. Including foreground (a tree top, a roof corner, a rock) gives depth, especially at lower heights.
Change of habit: experiment with flying closer to foreground elements while keeping your main subject framed beyond them.
Flying without a plan
If you power on the drone without any idea of what you want to shoot, you will waste battery time wandering. That is one of the main reasons people feel their shots are random.
Change of habit: before each flight, say out loud or write down one or two ideas: “line of the river at sunset,” or “pattern of parked boats.”
Not reviewing shots critically
Many beginners only view their photos on the drone screen or phone once, then post right away. They do not zoom in, they do not check sharpness, and they do not notice tilted horizons.
Change of habit: after each session, load your images on a larger screen. Review them with calm eyes. Ask yourself what worked and what did not. That feedback loop helps more than buying new gear.
Simple practice routines to improve faster
You do not need daily flights to improve. You need consistent, focused practice sessions.
Here are three routine ideas that can fit into normal life.
Routine 1: The familiar spot challenge
Pick one legal location near your home. A park, a beach, a field, a town square. Commit to shooting it from the air once a week for a month.
Rules:
– Each time, arrive at a different time of day or under different weather.
– Each time, try at least two new angles or heights you did not use before.
– At the end of the month, compare all sessions and pick your favorite three images.
This builds your eye for light and variety in a place you know well.
Routine 2: One composition pattern per flight
For each flight, pick one composition idea to focus on, such as “leading lines” or “symmetry.”
During the flight:
– Spend most of your time hunting for that one pattern.
– Avoid chasing every possible shot.
– At home, review how well you applied that pattern.
This sharpens your ability to see opportunities for that pattern in new places.
Routine 3: 10-shot limit
Give yourself a strict limit: only 10 photos per flight. That constraint sounds harsh, but it forces you to slow down and think before pressing the shutter.
You will quickly start to:
– Move the drone more before shooting.
– Check your composition twice before taking a frame.
– Value each shot more.
Over time, you can relax the limit, but the mindset stays with you.
When and how to upgrade your gear
Many people assume that weak photos mean they need a better drone. Often this is wrong. Weak photos often mean rushed work, poor light, or lack of clear subjects.
You might be ready for an upgrade when:
– You consistently hit the limits of image quality in low light, and you know how to expose correctly.
– You need wireless range or battery life for specific legal uses that your current drone cannot reach.
– You are doing client work where higher resolution or codec quality is required.
Before upgrading, ask:
– Have I fully explored what my current drone can do at different heights, angles, and times of day?
– Are my images limited more by the sensor or by my planning and editing?
– Could a simple filter set (like ND filters) solve my issues with bright light before I spend on a new drone?
Sometimes the best “upgrade” is structured practice and a bit more patience with light.
Final thoughts to guide your first year with a drone
Drone photography is not about owning a flying gadget. It is about adding a new perspective to your way of seeing. That takes time.
If you take only one thing from this guide, let it be this: every flight is a chance to answer one small question, not all questions.
One day: “What happens if I shoot my city at blue hour from 40 meters?”
Another day: “Can I tell a clear story about this small harbor from three angles?”
Another day: “How do patterns in these fields change with the sun lower in the sky?”
If you approach your flights with that kind of narrow focus, you will improve far faster than someone who just flies for fun and occasionally hits the shutter.
You will also avoid many of the mistakes that give drone pilots a bad name: unsafe flying, legal trouble, noisy presence where people want calm.
Use the rules as guardrails, not as limits on your creativity. Within them, you have a wide space for new views, strong stories, and images that hold attention far longer than a quick scroll.
And if your first flights give you shaky, overexposed, crooked photos, that does not mean drone photography is not for you. It only means you are at the true starting line, where everyone else began, whether they admit it or not.