
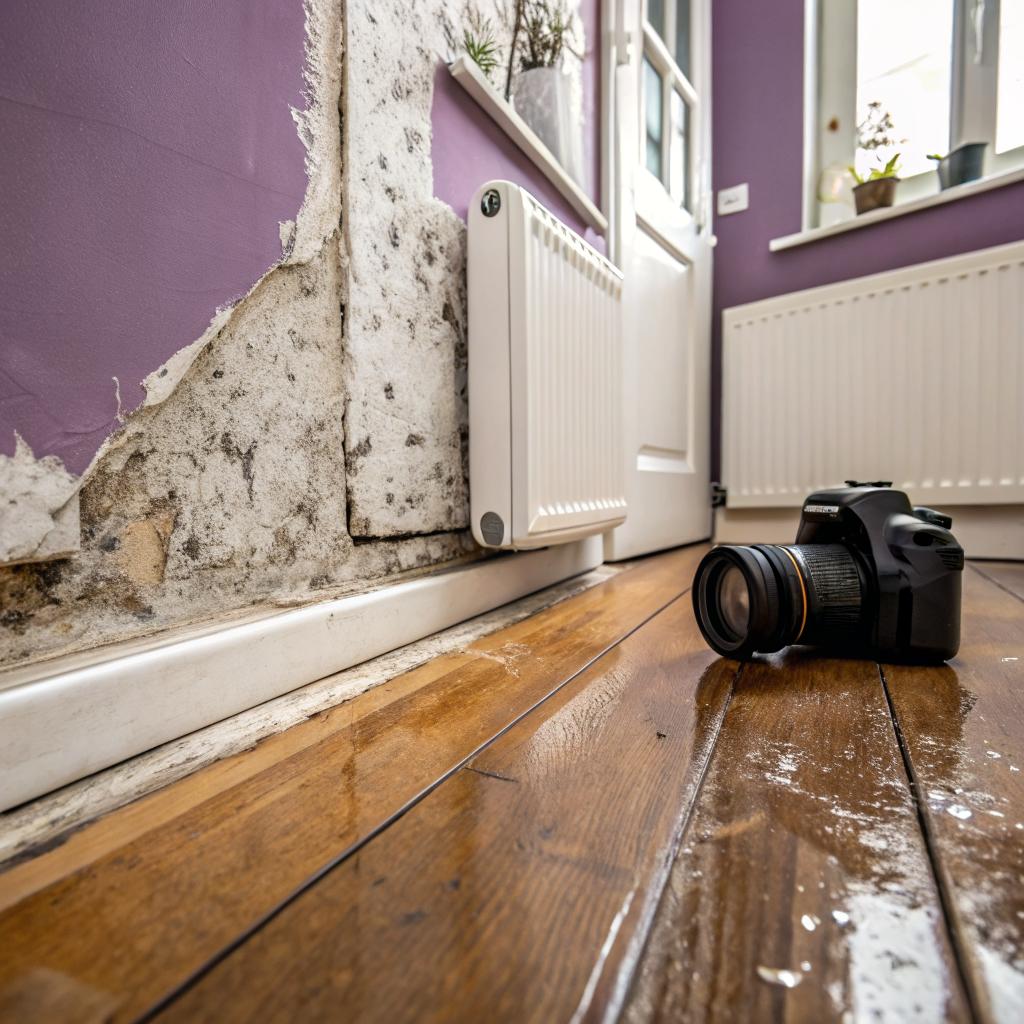

“If the water dries on its own, the damage is gone and you can skip calling a water damage company.”
That idea is false, and in many cases it is the reason a small leak turns into a major problem a few months later. When you are talking about soaked drywall, wet insulation, hidden moisture under flooring, and possible mold growth, you need proper drying, cleaning, and repairs. That is what professional water damage remediation Salt Lake City teams are set up to handle, and it is usually the safest way to protect your house and your health.
I have walked into homes where someone said, “It looked dry, so I thought it was fine,” and you can smell the musty odor from the front door. Paint bubbling, squeaky floors, doors that no longer shut right. None of that shows up on day one. It creeps in quietly.
So if you are reading this because you had a burst pipe, a leaky fridge line, a backup from a floor drain, or even a small roof leak after a storm, the short answer is simple: do not just wait and hope. You need a clear plan to remove the water, dry the structure, check for hidden moisture, and repair what is damaged.
I want to walk through what that process looks like in plain language, and also talk about some very local, very real questions that people in Salt Lake City have. Things like: How fast can someone get to my home? What does it usually cost? Will insurance help? And maybe the most common one, “Can I just do this myself with some fans from the garage?”
You probably already know the honest answer to that last one. Sometimes you can. Many times you really should not.
Water that you do not see any more can still be sitting inside walls, under baseboards, and in subflooring, feeding mold and weakening materials.
Why water damage in Salt Lake City is different than a spill on the kitchen counter
Wiping up a glass of water or mopping after a kid splashes in the bathtub is not what we are talking about here. Water damage remediation is for events where water soaks into materials and may keep spreading for hours.
Salt Lake City homes also have a few quirks that affect how water behaves:
– Many houses have basements or partial basements.
– You see real temperature swings between summer and winter.
– The air here is often dry, which sounds good, but it can trick people into thinking “it dried out fast” when the surface is dry and the inside is not.
Take a basement in Sugar House or Millcreek as an example. A small leak from a washing machine line can run along the floor, under base plates, and into wall cavities. You may only see wet carpet at first. By the next day, the baseboards and bottom of the drywall can already be swollen.
Water also behaves differently on different materials. Wood swells. Particle board can crumble. Concrete absorbs water slowly, then releases it slowly. Insulation can hold water like a sponge.
So when professionals talk about “remediation,” they are not just talking about sucking up visible water. They are talking about getting materials back to a safe moisture level, cleaning up what the water touched, and repairing what cannot be saved.
The basic steps of water damage remediation
Let me walk through the typical flow. Real jobs do not always follow this perfectly, but this is the core idea.
1. Emergency response and initial check
The first priority is to stop more water from coming in.
That might mean:
– Turning off the main water valve
– Shutting down a leaking appliance
– Covering a damaged section of roof
– Clearing a clogged drain or sump pump
A good technician will walk the property, take moisture readings, and try to find all affected areas. This is where experience helps. People who do this daily have a feel for where water likes to hide, especially in local home styles.
You should expect them to ask questions like:
– When did the leak start?
– Was the water clean, from a supply line, or dirty, from a drain?
– Have you done any cleanup already?
– Are there kids, older adults, or anyone with allergies or asthma living here?
Those questions are not small talk. They affect safety decisions, how aggressive drying can be, and what needs to be removed.
2. Water extraction
This step is the most visible. You see hoses, pumps, and wet vacs. The goal is to remove as much standing water and surface moisture as possible.
On a common job in Salt Lake City, this might include:
– Extracting water from carpet and pad
– Vacuuming water off hard floors
– Removing water from tight areas, like under cabinets
Quick extraction makes a huge difference. The less time building materials stay saturated, the more of them can be saved.
3. Removing wet materials that cannot be saved
This part can feel a bit harsh to homeowners. No one likes to see their carpet, part of their drywall, or lower cabinets cut out and removed.
Still, in many cases it is the right call.
For example:
– Wet carpet pad is usually discarded. It is hard to dry fully, and it can trap smells.
– Drywall that has been soaked from the bottom will often be cut a few inches above the wet line.
– Insulation that has been saturated needs to be pulled out, especially if the water was not clean.
Think of this like pulling out part of a rotten board so you can rebuild on solid wood. Leaving “just a little” wet material often comes back to haunt people.
4. Structural drying with air movers and dehumidifiers
Once the obvious wet materials are removed and surfaces are extracted, the slower work starts.
Technicians set up drying equipment, usually including:
– Air movers to blow air over wet surfaces
– Dehumidifiers to pull moisture from the air
– Sometimes, heaters to control temperature and speed drying
They will also return to:
– Take moisture readings of walls, floors, and framing
– Adjust equipment placements
– Remove equipment when materials reach target moisture levels
This stage can take several days. It might feel like “nothing is happening,” but it is the most critical part if you want to avoid mold and long term damage.
Drying is not about time alone. It is about bringing wood, drywall, and other materials back to safe moisture levels and confirming it with tools, not just with your hand.
5. Cleaning, sanitizing, and deodorizing
Water does not arrive alone. It carries dirt, dust, possible sewage, and sometimes chemicals from whatever it touched.
Good remediation includes:
– Cleaning of hard surfaces
– Possible disinfection if the water was gray or black (like a drain backup)
– Odor treatment so your home does not smell damp or musty
With clean water from a burst supply line, this step is usually simpler. With a drain backup or flooding from outside, it becomes much more serious.
6. Repairs and rebuild
Remediation stops damage and prevents further problems. After that, your home needs to be put back together.
Repairs may include:
– Replacing drywall and trim
– Installing new carpet or flooring
– Painting
– Rebuilding cabinets or vanities
– Fixing any structural damage that was uncovered
Sometimes the remediation company also handles repairs. Sometimes they coordinate with a separate contractor. Either way, this part brings your home back to normal.
How fast do you need to act after water damage?
You will see people say things like “You must act in 24 hours.” That is a bit dramatic, but the core idea has some truth.
Here is a helpful way to think about timing:
| Time from water event | What usually happens | Why quick action matters |
|---|---|---|
| First few hours | Water spreads horizontally across floors and into walls. | Stopping the source and extracting water limits the area affected. |
| 24 to 48 hours | Materials begin to swell, paint may bubble, odors can start. | Drying early can save drywall, trim, and flooring. |
| 2 to 7 days | Risk of mold growth increases, materials weaken. | Delays can mean more demolition and higher repair costs. |
| More than 1 week | Major risk of mold, structural damage, and air quality issues. | Remediation becomes deeper, with more removal and more expense. |
Can you start drying later? Sometimes. Is it wise to wait and see? Usually not.
Salt Lake City homes, especially older ones with finished basements and wood framing, rarely benefit from delay. The dry climate helps some, but it does not fix trapped moisture in wall cavities.
Clean water vs dirty water: why the source matters
Not all water damage is equal. Knowing where the water came from shapes the plan.
Category 1: Clean water
This is water from:
– Broken supply lines
– Leaking valves
– Overflowing sinks or tubs with clean water
If you catch it fast, a lot can often be dried and saved. Still, if clean water sits, it can become more contaminated over time.
Category 2: Gray water
This includes water from:
– Washing machines
– Dishwashers
– Some drain lines
This water has soaps, detergents, maybe food residue or dirt. It usually calls for more careful cleaning and sometimes more material removal.
Category 3: Black water
This is the serious one, such as:
– Sewage backups
– Flooding that brings in soil or street water
With this type, health risks jump. Porous materials that are soaked almost always have to be removed. Decontamination is a core part of the job.
If someone tells you “water is water” and treats a sewage backup like a basic spill, that is a problem.
Common sources of water damage in Salt Lake City homes
Every city has its own pattern. In Salt Lake City, these are some of the most common triggers people run into.
Plumbing failures
– Burst supply lines in winter
– Failing old copper pipes
– Worn out water heater tanks
– Cracked refrigerator or ice maker lines
Cold snaps stress pipes, especially in older homes or in parts of the house that are not well insulated.
Appliance leaks
– Washing machines on main or upper floors
– Dishwashers in older kitchens
– Water softener tanks or lines
These are often “slow” leaks at first. A drip that goes under flooring can run for weeks before someone notices.
Roof and gutter issues
– Ice dams along roof edges
– Gutters clogged with leaves
– Flashing failures around vents or chimneys
Water that enters from the roof can travel behind walls for a long distance before showing up as a stain on the ceiling.
Basement and foundation problems
– Poor grading around the house
– Window wells that fill with water
– Sump pump failures
Salt Lake City has many homes with finished basements that never had water problems for years, then suddenly flood one spring. Often a new landscaping project or clogged gutter is involved.
DIY drying vs professional remediation
This is where people sometimes get defensive. “Are you saying I cannot use my own fans?” Not exactly.
There are times when a simple cleanup is enough. For example:
– A small leak that soaked a bathroom rug and a bit of tile
– A quick spill in a kitchen where water did not reach walls or cabinets
– A minor overrun of a bathtub that you caught right away
In those cases, towels, fans, and a bit of patience may be just fine.
But there are clear signs you should call a professional team:
- Water soaked into walls, ceilings, or built-in cabinets
- Carpet and pad are soaked through, especially in a basement
- You cannot find the source, or it may be in a wall or ceiling
- There is any chance sewage or drain water is involved
- You notice a musty smell, visible mold, or warped materials
The main differences between DIY and professional work are not just tools, although that matters. It is also testing, training, and documentation for insurance.
Professionals use:
– Moisture meters and thermal cameras
– Commercial dehumidifiers and air movers
– Cleaning and disinfection products suited to the type of water
– Safety gear when needed for dirty water or mold
They also record what they find, what they remove, and how moisture levels change. That record can help with insurance claims and with future resale of the home.
Doing some early cleanup yourself is helpful, but guessing about hidden moisture can put your walls, floors, and air quality at risk.
How water damage remediation works with insurance
I am not an insurance adjuster, and every policy is a bit different. Still, there are some common patterns many Salt Lake City homeowners run into.
Events that are often covered
– Sudden pipe bursts
– Failing water heaters or appliances that leak suddenly
– Overflowing tubs or sinks that cause damage
– Some roof leaks from a covered storm event
The key idea is “sudden and accidental” rather than long term neglect.
Events that may not be covered
– Long term leaks you knew about but did not fix
– Groundwater flooding from outside during a storm, unless you have separate flood coverage
– Wear and tear from age
Also, policies often cover the damage, but not the fix of the actual broken item. For example, the water damage from a burst pipe may be covered, but replacing the old pipe itself might not.
It often helps to:
– Take photos and video of the affected areas
– Save any broken parts that explain the cause, like a failed valve
– Keep receipts and invoices from remediation and repairs
Good remediation companies in Salt Lake City are used to working with insurers. They often talk directly with adjusters and provide the documentation needed.
How to pick a water damage company you can trust
When water is everywhere, you may feel rushed. That is normal. Still, asking a few key questions before you say yes can make a big difference.
Here are some things to ask:
- Do you provide 24/7 emergency response, and how fast can you get here?
- Are you licensed and insured to work in Utah?
- Do your technicians have training or certifications in water damage restoration?
- Will you check for moisture in walls and under flooring, not just on the surface?
- Can you explain what needs to be removed vs what can be dried in place?
- How do you handle communication with my insurance company?
- Will I get a written plan and estimate?
You do not need perfect answers to every question, but if someone gets annoyed, vague, or pushes you to sign something without explanation, that is a red flag.
In my experience, the best companies balance speed with careful assessment. They do not scare you into doing more work than needed, but they also do not brush off real risks.
What water damage remediation looks like day by day
If you have never gone through the process, it can help to see what a typical job timeline looks like. Every case is different, but many follow something like this:
| Day | What usually happens | What you may notice |
|---|---|---|
| Day 1 | Emergency response, source shut off, inspection, extraction, initial demolition. | Noise, equipment being set up, some materials removed. |
| Days 2 to 4 | Drying with air movers and dehumidifiers, daily moisture checks. | Regular technician visits, equipment running, some areas taped off. |
| Days 4 to 7 | Final drying, equipment removal, planning for repairs. | Spaces start to feel more “normal,” though some walls or floors are still open. |
| Week 2+ | Repairs, painting, flooring, trim work. | Dust, some disruption, but clear progress back to normal. |
Again, these are rough numbers. A small bathroom leak might be quicker. A major basement flood can take longer.
Simple steps you can take before help arrives
If you are waiting on a team to arrive, you are not powerless. Safety comes first, but there are some basic steps you can take that can help reduce damage.
Stay safe first
Before you do anything:
– Watch for electrical hazards if water is near outlets or cords.
– Be careful on wet surfaces to avoid slips.
– If the water is from a drain or sewage, avoid touching it if you can.
Helpful actions
Without overdoing it, you can:
- Shut off the main water supply if a pipe is leaking.
- Move small furniture and valuables out of wet areas.
- Blot excess water with towels in small areas.
- Place aluminum foil or plastic under furniture legs to reduce staining.
- Open doors and closets to allow better air movement.
Try not to:
- Use ordinary household vacuum cleaners on standing water.
- Remove permanent flooring or cut walls without guidance.
- Use your home HVAC to “help dry” contaminated areas where sewage is involved.
You do not need to do everything. The arrival of a professional crew is still the key step. These early actions just give you a bit of control in a stressful moment.
Preventing future water damage in your Salt Lake City home
No one can prevent every problem, but some small habits can reduce your risk a lot.
Watch plumbing and appliances
– Check supply lines for your washing machine, dishwasher, and fridge. Replace old rubber lines with braided ones.
– Look for signs of corrosion on visible copper or galvanized pipes.
– Listen for your sump pump to run during wet weather and test it occasionally.
Care for your roof and gutters
– Clean gutters and downspouts before the wet season.
– Make sure downspouts direct water away from the foundation.
– After big storms, look for missing shingles or damaged flashing.
Protect your basement
– Keep items off the floor on shelves or platforms, especially boxes and electronics.
– Check around basement windows and window wells after heavy rain.
– Consider a battery backup for your sump pump if you rely on one.
Questions Salt Lake City homeowners ask about water damage
Is it safe to stay in my house during remediation?
Often, yes, especially for clean water events in limited areas. There can be noise, some dust, and inconveniences, but many families stay home.
If there is sewage, heavy demolition, or strong odors, or if anyone in your home has serious health issues, you might talk with the remediation company and your doctor about temporary relocation. It is not always needed, but you should at least ask.
Will everything be put back exactly how it was?
Repairs aim to restore function and appearance, often to a “pre-loss” condition. That said, you may choose to upgrade some finishes at your own cost, or change colors, materials, or layouts.
In some cases, you may notice small differences even after careful work, especially in older homes where matching exact textures or materials is hard. Talk with your contractor about what matters most to you.
How do I know when an area is really dry?
Touch alone is not reliable. Professionals use moisture meters that measure levels inside materials. You can ask them to show you readings and explain what the target levels are.
If a company says “it feels dry, so we are done” without measurements, that is a concern.
Can water damage show up months later?
Yes, and this is one of the frustrating parts. Maybe you fixed the visible water but missed some inside a wall.
Signs that hidden damage is still present include:
– Musty smells that do not go away
– Discoloration or staining that grows
– Paint bubbling or peeling
– Warped or soft spots on walls or floors
If you see these, it may be worth calling a professional for a moisture and mold check, even if the original event was a while ago.
How can I prepare, so I am not caught off guard next time?
You cannot predict every leak or storm, but you can:
– Know where your main water shutoff is and test that it works.
– Keep the number of a trusted water damage company handy.
– Review your insurance policy so you roughly know what events are covered.
– Do a quick home check twice a year for slow leaks, worn hoses, and roof issues.
Water in a home is stressful, but it does not have to become a long term crisis.
If you walked into a wet mess today, would you know your next three steps?
