“I do not need a backup for my photos. They are already safe on my phone and Instagram.”
That quote is false. Dead wrong, actually. If your photos only live on your phone, laptop, or inside social media apps, they are not backed up. They are one accident, one coffee spill, or one hacked account away from disappearing. The real decision is not “Should I back up my photos?” but “Where should I back them up: cloud, hard drive, or both?”
I might be wrong, but it seems to me that most people only start caring about backup after losing something precious. A baby picture. A vacation. A family member. Then the question “cloud vs hard drive” suddenly stops feeling like a tech choice and starts feeling like damage control.
You do not want to wait for that moment.
So in this article, I want to walk through how cloud storage and hard drives really compare for photo backup, what I actually recommend in practice, and how you can set this up without turning your life into a tech project.
No hype. No extremes like “cloud is the future, hard drives are dead” or “never trust the cloud”. Both views miss the nuance. The right answer for you depends on how you shoot, how often, and how much work you are willing to do to keep things safe.
“Cloud storage never fails. Hard drives always fail.”
That one is also wrong. Cloud services can lose data. Accounts get locked. Companies shut down. Hard drives can last many years if treated with care. Reality lives in the middle. Each option has tradeoffs: cost, speed, control, privacy, effort.
Let us break this down in a way that actually helps you make a decision, not just memorize buzzwords.
What “backing up your photos” really means
Before comparing cloud and hard drive, we should be clear on what a backup actually is.
A lot of people think they have a backup when they do not.
If your photos are only in one place, that is storage, not backup. If they exist in two places, but those two places are always plugged into the same computer, that is still weak. A virus or a theft can wipe them both in one hit.
Backup means at least one extra copy of your photos, in a different place, that you can restore from if something goes wrong.
Ideally, three copies:
1. One copy you work with daily (phone, main computer).
2. One local copy that you control (hard drive, NAS).
3. One offsite copy (cloud or a drive kept somewhere else).
Do you need to be that strict? I think you do if the photos really matter. For casual snapshots, maybe not. Still, if you care enough to read an article about backup, you probably care enough to do this properly.
“Google Photos / iCloud is my backup, I am covered.”
This one is tricky. The answer is: sort of. Cloud photo apps are a step in the right direction. They do protect you from phone loss or hardware failure. But they still leave gaps:
– If your account gets banned or hacked, you can lose access.
– If you delete a photo on your phone, it can vanish from the cloud too.
– If the service changes terms or compresses images, you may lose quality.
So cloud-only is better than nothing. Just not as strong as it looks on the surface.
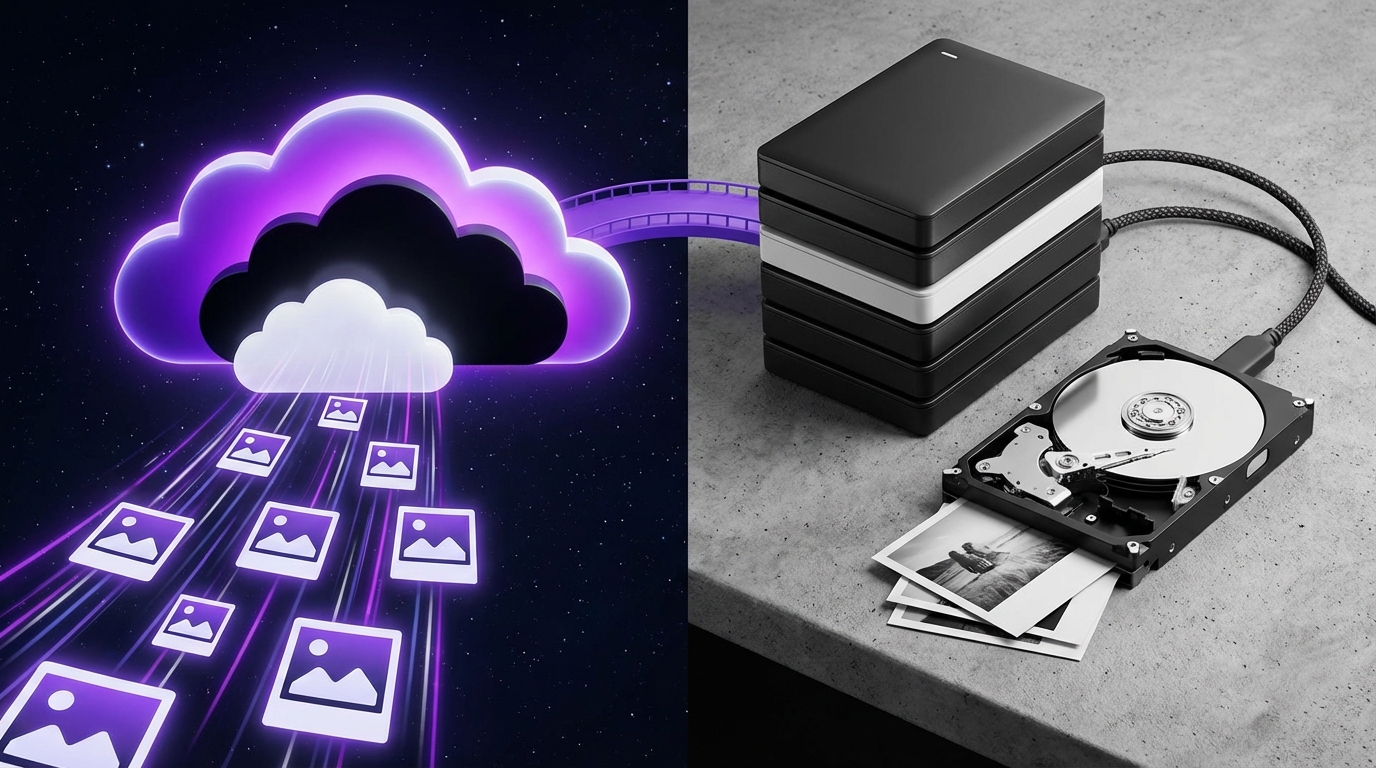
Cloud backup vs hard drive backup: quick comparison
I know you asked about cloud vs hard drive, so here is a clear side-by-side. We will go deeper in the next sections.
| Aspect | Cloud Backup | Hard Drive Backup |
|---|---|---|
| Where your photos live | Remote data centers managed by a provider | Physical drive in your home or office |
| Protection from fire/theft at home | Very strong | Weak, unless drive is stored elsewhere |
| Protection from account loss / hacks | Weaker, depends on security settings | Strong, you hold the device |
| Upfront cost | Low to none | Moderate (you buy the drive) |
| Ongoing cost | Monthly / yearly subscription | Very low, maybe a new drive every few years |
| Speed to back up large folders | Can be slow on weak internet | Fast over USB or internal connection |
| Speed to restore everything | Limited by internet speed, can take days | Much faster, plug and copy |
| Ease of automation | Very high, runs in the background | High with proper software, low if manual |
| Control over data | Provider controls servers and policies | You control the drive and access |
| Risk of hardware failure | Provider handles redundancy | All on you, drive can fail suddenly |
So which is “better”? On its own, neither. Together, they cover each other’s gaps. If you only pick one, you accept certain risks. The question is which risks you are willing to live with.
How cloud photo backup actually works
Cloud backup means your photos are copied from your device to remote servers owned by a company. That company keeps several copies of your data across different machines and sometimes different locations.
You access your photos through:
– A web browser.
– An app on your phone.
– A desktop app that syncs or backs up specific folders.
Different services have different focus:
– Some are built for backup first (Backblaze, IDrive, Acronis, similar tools).
– Some are built for sharing and viewing (Google Photos, iCloud Photos, Amazon Photos, OneDrive Photos).
Pros of cloud backup for photos
Let me walk through the real strengths, not just marketing.
“With cloud backup, you never have to think about it again.”
This is almost true, but only if you set it up correctly.
Key advantages:
1. Automatic offsite copy
Once configured, many services constantly watch your photo folders and send new files to the cloud. You do not have to remember to plug anything in. That convenience matters because human memory is not reliable.
2. Protection from local events
If your home is broken into, if there is a fire, or if your laptop is stolen from a cafe, your photos still live in your online account. For life events like weddings, kids growing up, or client projects, that protection is valuable.
3. Easy access from anywhere
You can show a photo from your trip while standing in a line, or pull an image for a client even if you forgot your drive at home. Even if this sounds small, it changes how you interact with your library.
4. Version history and file recovery
Many cloud tools keep older versions of files or items you have deleted for some time. If you accidentally edit or crop an image badly and save over it, you can jump back. Hard drives only do this if you run extra software.
5. No physical wear and tear
There is no disk on your desk that someone can drop, spill coffee on, or bump off the table. The provider handles hardware failures behind the scenes.
Cons of cloud backup for photos
This part is where marketing goes quiet.
1. Dependent on internet speed
Large photo libraries (think tens or hundreds of gigabytes) can take days, sometimes weeks, to upload over slow connections. Restoring them can be just as slow. For a 1 TB library on a slow line, that is painful.
2. Ongoing subscription cost
You pay every month or year. Over 5 or 10 years, the total cost can be higher than buying multiple good hard drives. Many people do not do this math, then feel trapped when prices go up.
3. Account risk
If you lose your password, skip two-factor, or break the provider’s rules, you can lose access. I have seen people lock themselves out of old email addresses tied to their accounts and lose everything. Recovery is not always simple.
4. Privacy concerns
Your images sit on someone else’s machines. Even with good privacy policies, some people are not comfortable with that. Depending on the provider, photos might be analyzed to power features like search, or used to personalize ads. You should check their terms instead of guessing.
5. Compression and quality loss
Some cloud photo apps compress images by default to save space. Your pictures may still look fine on a phone, but you lose detail. If you care about full-resolution originals, you must turn on that setting and often pay more.
How hard drive photo backup works
Hard drive backup means you copy your photos to a physical drive:
– External USB drives (portable or desktop).
– Internal drives in a PC.
– SSDs.
– Network drives at home (NAS).
You can copy files manually or run backup software that does it on a schedule.
Pros of hard drive backup for photos
“Hard drives are unreliable, they always fail in a year or two.”
That line is exaggerated. Drives do fail, but with decent care and some basic habits, they can last many years. Here is where they shine.
1. One-time cost, lots of space
For the price of a few months of cloud subscription, you can buy a multi-terabyte drive and store hundreds of thousands of photos. No ongoing bill. For big collections, this is cost-effective over time.
2. Fast backup and restore
Plug a USB 3 or USB-C drive into your computer and you can copy hundreds of gigabytes in hours, not days. If you lose your main drive, restoring from a local backup is far quicker than pulling from the cloud.
3. Full control
Your photos do not sit on a third-party server. No one can lock you out of your own drive. No terms change without your consent. You decide how to organize, label, and store them.
4. Works without internet
If your internet is slow, capped, or unreliable, hard drives are practical. You are not bottlenecked by upload or download speed.
5. Easy to store offline
An external drive can be unplugged and kept in a drawer, safe, or at a friend or family member’s place. That gives you some offsite safety without a subscription.
Cons of hard drive backup for photos
Hard drives come with their own problems.
1. Mechanical failure
Drives can fail suddenly. They have moving parts (except SSDs) and are sensitive to drops, heat, and power surges. Without a second drive or an offsite copy, one failure can wipe your only backup.
2. Human forgetfulness
The drive only protects your new photos if you connect it and run a backup. Many people start strong, then get busy and forget for months. That gap is where losses happen.
3. Physical risk
That drive can be stolen, lost, victim of a flood, or damaged with your main device. If your only backup lives under the same roof, one bad event can take both.
4. Less handy for on-the-go access
If you are away from home and need an old photo, the drive sitting on your desk will not help. You would have to carry it with you, which is risky.
5. Limited by ports and compatibility
Newer laptops sometimes have fewer ports. Old drives might use older connectors. Over time, connecting everything can become a bit messy, especially if you use different operating systems.
Common backup mistakes with photos
Before picking cloud vs hard drive, I want to call out a few habits that quietly put your photos at risk. If you recognize yourself in these, you are not alone.
“I export my favorite photos to a folder on my desktop, that is enough.”
Not enough. That folder is still on the same device. If the drive fails, the desktop folder fails with it.
Here are typical weak points:
1. Trusting one device
– All photos sitting on one phone.
– All RAW files on one laptop.
– All edits inside a single photo app library.
If this device dies, gets dropped, or is lost, everything vanishes. Storage is not backup.
2. Treating social media as storage
Uploading to Instagram, Facebook, or TikTok is not a backup plan. Those platforms compress images heavily and are focused on feeds, not long-term storage. Accounts are often banned or hacked with little warning.
If your only copy of an old picture is on a social feed, you have less control than you think.
3. Relying on a single cloud account
Cloud is safer than no backup, but if your photos live only in one online service:
– Losing access to that login is risky.
– A bug or mistake in the service can hit you.
– Policy or region changes can affect your library.
I am not saying this happens every day, but you want to reduce single points of failure.
4. Never testing your backups
A backup that you never try to restore from is just a theory. People assume things are safe for years without checking. Then in the one moment they need it, they find corrupted files, missing folders, or half their collection gone.
Once in a while, you should actually restore a few files to confirm your setup works.
Cloud vs hard drive: which is better for different types of users
Not everyone shoots the same way. So let us break this down by how you work with photos and how much risk you can accept.
For casual smartphone shooters
If your photos live almost entirely on your phone, and you rarely transfer them to a computer:
– Turn on a cloud photo service like iCloud Photos, Google Photos, or Amazon Photos.
– Set it to back up at original quality, at least for your most important images.
– Use a second method as well, at least once every few months.
For example:
– Cloud: iCloud or Google Photos auto-sync.
– Local: A small external drive where you copy photos from your phone via your computer or directly with an adapter.
This gives you a backup even if your phone is stolen and your cloud account has a problem.
For hobby photographers
You shoot with a camera, maybe RAW files, and store photos on a computer.
Here a mixed approach works well:
– Local: One or two external drives, copied with backup software on a schedule.
– Cloud: A backup tool that covers your main photo folders, or a photo-focused cloud like Lightroom cloud syncing if you use that.
This way:
– You have fast local copies for everyday issues.
– You have an offsite copy if something happens to your home.
For professionals and serious creators
If you are paid to shoot, you cannot treat backup as an afterthought. Losing client work can damage trust, income, and reputation.
I would argue that you need at least:
– A primary working drive.
– A local backup drive (often a second drive or a RAID system).
– A cloud backup that covers the full archive.
You might even add:
– An extra external drive kept at a different location for finished jobs.
The cost and complexity go up, but they are still tiny compared to the cost of losing a wedding shoot or a multi-day commercial project.
The real answer: use both cloud and hard drive
If you came here hoping for a simple either/or, this might annoy you, but the most reliable setup is a mix.
Cloud alone leaves you at the mercy of your connection and your provider.
Hard drive alone leaves you at the mercy of accidents, failure, and theft.
Together, they reduce each other’s weak spots.
Let me frame it more concretely:
| Risk | Covered by Cloud? | Covered by Hard Drive? | Covered by Both? |
|---|---|---|---|
| Phone / laptop loss | Yes | Yes (if recently backed up) | Yes, with extra safety |
| House fire / theft at home | Yes | No, unless drive stored elsewhere | Yes, if at least one copy is offsite |
| Cloud account lockout | No | Yes | Yes, local copy saves you |
| Hard drive failure | Yes | No | Yes, cloud copy saves you |
| Accidental deletion on one platform | Sometimes, if no version history | Sometimes, if backup is not overwritten | Better odds of recovery from at least one |
| Temporary internet outage | No new backups during outage | Backups still work locally | Local covers until internet returns |
So the real plan is not “cloud vs hard drive”. It is “cloud plus hard drive with a system that you can actually maintain”.
A practical setup you can copy
I will walk through a simple approach you can adjust. Not the only way, but a good baseline.
Step 1: Pick where your “master” photo library lives
You need one place that you treat as the source of truth. That can be:
– A folder structure on your main computer.
– A photo library inside an app like Lightroom or Apple Photos.
Try to avoid spreading your “real” photos across random USB sticks, old laptops, and unorganized smartphone storage. Pull everything into one place.
If your phone is your main camera, set it to sync photos to your computer automatically or at regular intervals.
Step 2: Add a local hard drive backup
Buy an external drive that is at least 2 times larger than your current photo library. This gives room for growth.
Then:
– On Windows: Use something like File History or a backup app that mirrors your photo folders to the drive on a schedule.
– On macOS: Use Time Machine or a dedicated backup app.
Key habits:
– Keep the drive disconnected when not backing up if you are worried about ransomware.
– Plug it in at predictable times. Weekly is decent for most people; daily for heavy shooters.
If you want extra safety, rotate between two drives. One can live at home, one at a friend’s or relative’s place, swapped every month.
Step 3: Add a cloud backup layer
Here you have two main paths:
1. A general backup tool that silently backs up chosen folders.
2. A photo-centric cloud service that cares more about viewing and organizing.
If your main goal is safety, I would lean toward a full backup tool. It usually backs up not only photos but also your other files, which is a bonus.
Steps:
– Choose a plan that fits your total data size.
– Point it at your main photo folders.
– Turn on continuous or daily backup.
Watch the first big upload. It might take time. Let it run and try not to interrupt it too much.
If you are on a limited connection, most services let you:
– Throttle upload speed.
– Schedule uploads for night hours.
Step 4: Decide how long you keep things
Retention is where backups quietly fail. If you delete a folder by mistake and your cloud tool syncs that deletion instantly and keeps no history, you might not get it back.
Look for settings like:
– Version history.
– Deleted file retention.
– Options that say something like “keep deleted files forever” or at least “for 30-90 days”.
On your external drive, try to avoid habits such as:
– Manually organizing inside the backup itself.
– Deleting image sets directly on the backup drive.
Treat the backup as a copy, not your working space.
Step 5: Do a small restore test
Do not skip this.
Take 5-10 photos that are not critical. Delete them from your main device (after copying them somewhere else as a safety net if you are nervous). Then:
– Restore them from your hard drive backup.
– Restore them from your cloud backup.
Make sure:
– The files open.
– The edits (if any) are there.
– The process is clear to you.
If something breaks here, fix it now, not when your only copy is gone.
Picking services and drives: what actually matters
I will not push any specific brand, but there are simple criteria you can use to choose.
How to pick a cloud photo backup service
Look at these points:
| Criteria | What to look for |
|---|---|
| Storage space | Enough for your current library plus growth over 3-5 years |
| Retention policy | Version history, deleted files kept for weeks or months |
| Original quality | Option to store full-resolution, not only compressed |
| Client apps | Works well on your OS and phone; stable and simple |
| Two-factor authentication | Supports extra security beyond passwords |
| Export and migration | Easy way to download all your data if you switch later |
| Pricing structure | Check yearly cost and how it scales with storage |
One thing people often ignore is “How hard is it to leave this service later?” A good provider lets you export your entire library without weird limits.
How to pick a hard drive
For photo backup, you do not need the fastest, most expensive pro model.
Focus on:
– Capacity: At least 2x your current usage.
– Reliability: Brands with steady track records.
– Connection type: USB 3.0 or better; USB-C is great if your machine supports it.
– Form factor: Portable drives are compact; desktop drives often have better airflow and sometimes longer lifespans.
If your budget allows, SSDs are faster and less prone to physical shock, but they cost more per gigabyte. For pure backup, large spinning drives are still common.
Security and privacy basics for photo backups
Backing up your photos is only half the job. Protecting that backup from unauthorized access also matters, especially if your library contains personal or client content.
Strengthening cloud security
At minimum:
– Turn on two-factor authentication.
– Use a unique, strong password that you do not reuse anywhere else.
– Keep your recovery email and phone number up to date.
If the service supports it, consider:
– App-specific passwords for backup apps.
– Review of active sessions from time to time.
If you are handling sensitive images, you might encrypt them before sending them to generic cloud storage. This adds complexity, so think about whether you will remember how to decrypt them years later.
Protecting your hard drives
Local drives can be encrypted:
– On Windows: BitLocker is common on some editions.
– On macOS: FileVault or encrypted disk images.
Make sure:
– You write down or securely store recovery keys.
– You can unlock the drive on at least one device you control.
There is a tradeoff here: strong encryption protects your privacy, but if you forget passwords, you lose the data. Do not set rules that you cannot keep.
How often should you back up your photos?
There is no magic number, but here is a simple way to think about it:
Ask yourself: “If I lost all photos taken since my last backup, how upset would I be?”
– If losing a week of photos would hurt, back up weekly.
– If losing a month is acceptable, monthly may be fine.
– If you rely on photos for work, aim for daily automatic backups.
Most cloud tools can handle the daily side. For hard drives, decide on a routine that you can maintain. For example:
– Every Sunday night: plug in the drive, run the backup, unplug when done.
Set a reminder if you need to. Do not rely on memory only.
Fixing a bad approach: are you doing this wrong?
You asked me to tell you when you are wrong or taking a bad approach, so here is where I will be direct.
If you currently:
– Keep everything only on your phone or laptop.
– Only send important photos to a friend on WhatsApp.
– Think that Instagram or another app doubles as storage.
– Have one old external drive with no idea what is on it.
Then your approach is weak. You are taking more risk than you think.
If you:
– Pay for a cloud service but have not checked your settings.
– Run backups “whenever you remember”.
– Never restored a single file to test the system.
You are relying on assumptions instead of proof. That might work for a while, until it does not.
The bad approach is not “cloud” or “hard drive” by itself. The bad approach is “one copy, one place, never tested”.
How to migrate your existing mess into a safer setup
Many people hesitate to start because they already have chaos:
– Photos on multiple phones.
– Old laptops in a closet.
– Random SD cards and USB sticks.
It feels heavy, so they keep putting it off.
Here is a simple path forward.
1. Gather everything
Pick one computer with enough space and:
– Copy photos from your current phone.
– Pull images from any old phones if you can still turn them on.
– Connect old drives, SD cards, and USB sticks; move all pictures to a “To Sort” folder.
Yes, this can take time. But you only do this big sweep once.
2. Create a simple structure
You do not need a perfect system. A basic one:
– Main Photos Folder
– By Year (2021, 2022, 2023, etc.)
– Inside each year, use month or event names.
Move files roughly into the right year. You can use your operating system’s “date taken” field to help. Perfection is not the goal. Getting out of chaos is.
3. Back this up locally
Once you have a rough structure:
– Copy this entire main folder to your external hard drive.
– This gives you a safety net before you refine things further.
4. Start the cloud backup
Point your cloud backup at this main photo folder and let it run. Once the big upload is finished, your risk level goes down a lot.
When cloud might be enough and when it is not
You might still wonder if you can just pick cloud and stop thinking about hard drives.
Cloud might be “enough” if:
– Your photo library is small.
– You are fine with ongoing subscription fees.
– Your internet is fast and stable.
– You would not be ruined by a rare worst-case event.
Cloud is not enough if:
– You shoot professionally.
– You have irreplaceable family history scanned into images.
– Your internet is slow, capped, or expensive.
– You are not comfortable depending on one company.
In those cases, adding at least one local hard drive is not just a nice extra. It is common sense.
When a hard drive might be enough and when it is not
Some people dislike cloud services deeply and want to manage everything locally. That is your choice, but be honest about the risks.
A hard drive can be “enough” if:
– You keep more than one copy on different drives.
– At least one copy lives away from your main location.
– You test your backups from time to time.
A single hard drive at home, by itself, is not a strong backup solution. It is better than nothing, but not by much when serious incidents happen.
Final check: what should you do next?
Rather than just reading and moving on, pick one small step for the next week.
Here are a few simple choices:
– Turn on automatic cloud backup for your phone photos at original quality.
– Order an external drive that is at least twice your current photo size.
– Set a weekly reminder to plug in your drive and back up.
– Do a restore test from whatever backup you already have.
– Start a “Main Photos” folder on your computer and gather your scattered pictures there.
You do not have to build a perfect system in one day. But every day you delay, your photos depend on luck.
Cloud vs hard drive is not a fight. It is a menu. The smart move is to pick both and give your memories more than one lifeline.