
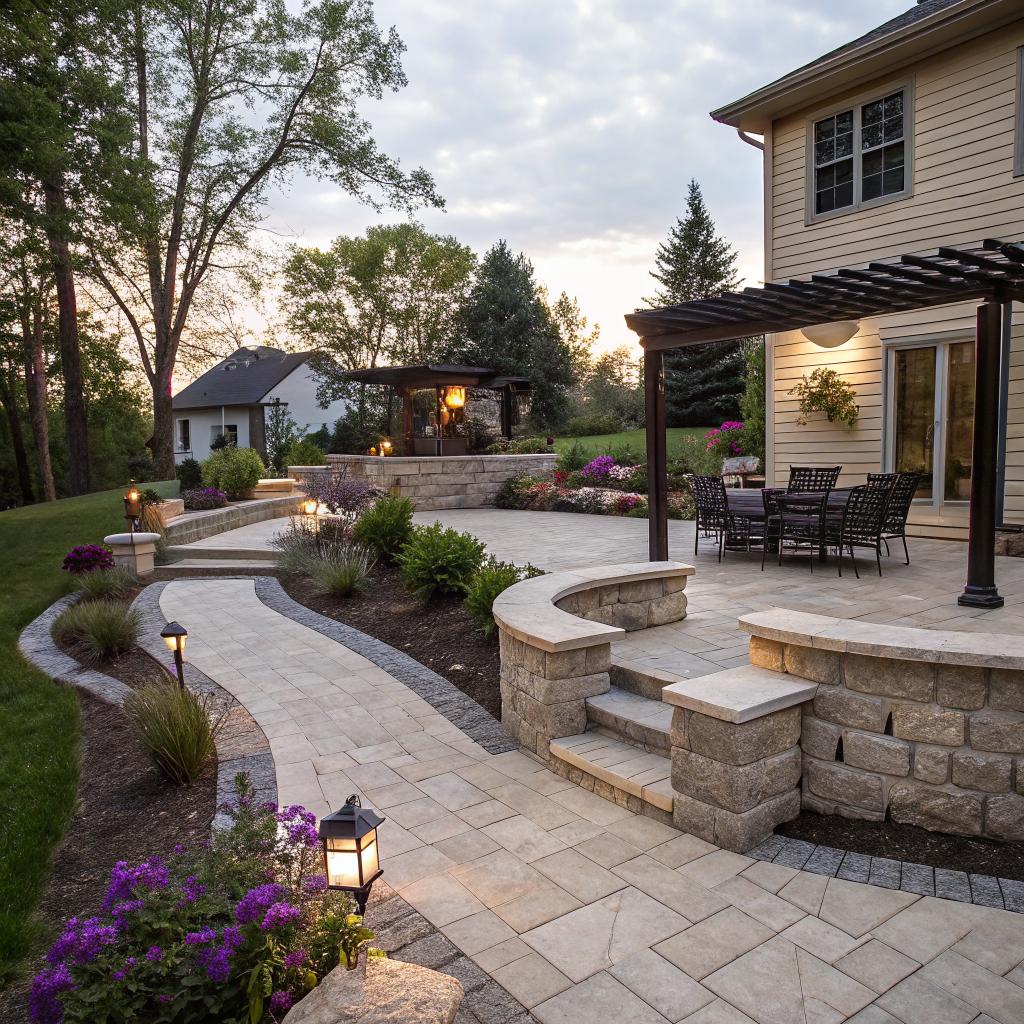

“Hardscaping always makes a yard feel cold and lifeless. Real outdoor beauty comes only from plants.”
That sounds confident, but it is not true. A well planned patio, walkway, or stone wall can make your yard feel warmer and more welcoming, not less. The key is how you design and build it, how you mix hard surfaces with plants, light, and the way you actually live. If you plan your hardscaping Appleton project with your daily routine in mind, and work with someone who understands local soil and winters, you can turn a plain yard into a space you actually use, not just look at from the window. If you want to see what that looks like in real life, you can check local examples of hardscaping Appleton to get a sense of style and practical layouts.
I will be honest. Hardscaping is one of those topics that seems simple at first. Just put in a patio, maybe a wall, and you are done. But once you start planning, you realize how many decisions sit behind a single path or fire pit. Materials, drainage, snow, ice, how far the grill is from the kitchen door, where kids will run, how your dog actually uses the yard. It becomes less about “pretty stones” and more about how your outdoor space works.
That is what this guide focuses on. Not just what you could build, but what actually makes sense for a home in Appleton and nearby towns. The climate is a big part of it. Winters are long. Freeze and thaw cycles are rough on surfaces. Summers can be hot, and people try to squeeze a lot of outdoor time into a few months. Your hardscaping has to handle all of that without sinking, cracking, or turning into a skating rink.
I am going to walk through the common hardscape features, the local factors that matter, and some simple planning steps. This is not design school. It is more like a long conversation with a friend who has looked at a lot of yards, made a few mistakes, and paid to fix some of them.
Hardscaping works best when you think about how you live first and what looks nice second.
You might find that slightly annoying, especially if you already started shopping for stone and pavers, but it saves money and headaches later.
What “hardscaping” really means in a Wisconsin yard
Hardscaping is any non-living, built part of your outdoor space. It includes surfaces you walk on, places you sit, and structures that hold soil or frame areas. In an Appleton yard, that usually means a mix of:
– Patios and seating areas
– Walkways and front entries
– Driveways and parking pads
– Retaining walls and garden walls
– Steps and landings
– Fire pits and outdoor kitchens
– Edging, borders, and low walls around beds
Softscaping is everything living: trees, shrubs, perennials, lawn. The two work together. A big stone terrace with no plants feels harsh. A yard with only grass and beds, no paths, can feel awkward to use. The balance is personal, but the point is simple: you are not choosing one or the other. You are deciding how much of each.
I once visited a yard in Appleton where the owner had poured a massive concrete patio, almost the entire width of the house. There were no trees near it, no shade structure, and no clear edge where the hard surface ended and the rest of the yard began. In May it looked fine. In July, at noon, it felt like standing on a parking lot. He used less than a third of it.
That is a good example of hardscaping without enough thought about comfort, seasons, and plants.
Appleton climate: why it matters for stone, pavers, and concrete
There is a simple rule for any hardscaping in this part of Wisconsin:
If it does not handle freeze and thaw, it will fail early, no matter how nice it looks on day one.
Our winters affect your project in a few key ways.
Freeze / thaw cycles
Water seeps into joints and surface pores. When it freezes, it expands. This can:
– Pop thin or low quality pavers
– Crack poor concrete mixes
– Lift sections that were not set on a stable base
That is why you see failed steps or sunken edges in some older yards. The problem often starts underground, not on the surface.
For Appleton, that means:
– Use pavers and stone rated for freeze / thaw conditions
– Avoid very thin patio materials set directly on soil
– Pay close attention to base depth and compaction
A pretty pattern does not mean much if half of it is uneven after two winters.
Drainage and grading
Water needs a place to go. If water pools on your patio or runs toward your house, you will fight ice, slippery areas, and possible foundation issues.
Basic things to check:
– Patios and walks need a gentle slope away from the house
– Downspouts should not dump water onto hard surfaces where it will freeze
– Low spots in the yard might need a drain, swale, or dry well
Try watching your yard during a heavy rain. Where does the water gather? That tells you a lot about where a patio or path will work and where it will cause trouble.
Snow and ice management
In this area, snow removal is part of life. Your hardscaping should work with that, or you will hate it by January.
Questions to ask yourself:
– Can you easily shovel or snow blow your main paths?
– Are you using de-icers on surfaces, and are they safe for the material?
– Are there steep slopes that will be slick in winter?
Some textured pavers give better grip than smooth concrete. Darker colors can help melt snow faster under sun. Small details like that make winter safer and less frustrating.
Common hardscape features in Appleton and how to think about them
Instead of a long list of options, it helps to think in zones: where you walk, where you sit, where you gather, and where you hide the less pretty stuff.
Patios: your outdoor living room
A patio is usually the first big hardscape project. It costs more than a simple path, and people tend to either undersize or oversize it. Both cause regret.
Ask yourself:
– How many people do you actually host, most of the time?
– Do you want room for a table, lounge chairs, or just a grill and two chairs?
– Do you prefer sun, partial shade, or full shade in summer?
A rough guide that I have seen work in Appleton:
| Use | Typical size range | Notes |
|---|---|---|
| Small bistro area (2 people) | 8 x 8 ft to 10 x 10 ft | Good for townhomes or side yards |
| Family dining (4 to 6 people) | 12 x 14 ft to 14 x 16 ft | Space for table, chairs, grill |
| Entertaining (8+ people) | 16 x 20 ft and up | Plan separate zones for sitting and cooking |
Those are not rules, but they help you avoid a cramped space where chairs hit walls, or a huge area that feels empty.
Walkways and entries
Front walks do more than connect the driveway to the door. They set the tone for your whole property. In Appleton, where winter boots and big coats are common, very narrow paths get annoying quickly.
Think about:
– Width: 4 feet feels comfortable for two people walking side by side
– Shape: gentle curves soften the look without making shoveling too hard
– Material: concrete, pavers, or stone that handle salt, snow, and shovels
If you like curves, keep them broad. Tight, wiggly lines look nice on paper but are awkward for snow removal and can feel fake in a small front yard.
Retaining walls and seat walls
Many Appleton yards are not perfectly flat. Retaining walls can hold soil, create level terraces, and prevent erosion. Shorter walls, around 18 to 22 inches high, can also double as seating.
There are three main options:
| Material | Good for | Watch out for |
|---|---|---|
| Segmental block (manufactured) | Most residential walls, seat walls | Needs correct base and drainage; cheap blocks can look dated |
| Natural stone | Rustic or higher-end look | More labor cost; careful installation needed for stability |
| Poured concrete | Structural needs, modern style | Cracks if not designed for freeze / thaw, often needs facing |
If a wall is taller than 4 feet, engineering and permits might come into play. For anything large, it is smart to ask a pro. You do not want to rebuild a failed wall after five winters.
Fire pits and fireplaces
Many Appleton homeowners like a fire feature because it stretches the season. Sitting by a fire in October or early May feels great.
You can build:
– A simple, portable fire pit you move on and off a gravel pad
– A built-in fire ring out of block or stone
– A full outdoor fireplace for a bigger statement
Think about wind patterns in your yard, where smoke will go, and how close you are to neighbors. Also check local rules on open fires. A basic gravel or paver pad under a portable pit is a nice middle ground if you are not ready for a full build.
Outdoor kitchens and grills
Outdoor kitchens are tempting on social media. In real life, many people in this region use them only a few months a year. That does not mean you should avoid them, but be honest about your cooking habits.
Questions to ask:
– Do you mostly grill burgers and brats, or do you cook full meals outside?
– How close do you want the cooking area to the indoor kitchen?
– Where will smoke go, and will it bother windows or neighbors?
A solid, simple grill station with some counter space and storage can work better than a giant, expensive layout packed with features you barely touch.
Materials that work well in Appleton
Material choice affects cost, look, and durability. You do not need to know every product type, but some basic pros and cons help.
Concrete pavers
Pavers are popular for patios, walks, and driveways across Wisconsin.
Pros:
– Many colors and patterns
– Good for freeze / thaw when installed correctly
– Repairs are easier, since you can lift and replace units
Cons:
– Joint sand can wash out or grow weeds if not maintained
– Poor base prep will cause shifting and settling
If you pick pavers, look at full projects in person, not only sample boards. Colors in brochures can look very different in natural light.
Poured concrete
Concrete is common for driveways, walks, and simpler patios.
Pros:
– Often lower initial cost than detailed paver work
– Clean, simple look
– Works well for modern or minimal designs
Cons:
– Cracks are very likely over time, even with control joints
– Repairs are hard to hide
– Needs careful mix and curing in this climate
Some people add texture or color to concrete. Just be cautious with very smooth finishes; they can be slippery when wet or icy.
Natural stone
Natural stone gives a unique look. No two pieces match exactly.
Pros:
– Rich, timeless appearance
– Works nicely with plantings and more natural settings
– High durability when the right stone type is used
Cons:
– Higher material and labor cost
– Can be uneven if not installed with care
– Some stones do not handle freeze / thaw well
Ask suppliers which stone types perform best in Wisconsin so you do not pick something that flakes or spalls after a few winters.
Gravel and loose materials
Gravel is often overlooked, but it can be very useful.
Pros:
– Lower cost
– Good for drainage
– Flexible; easy to adjust or extend
Cons:
– Moves around under traffic
– Can be tricky with snow removal
– Not great for people with mobility issues
Gravel works well for side yards, service paths, or bases under sheds and fire pits.
Planning your hardscaping Appleton project step by step
You do not need fancy design training to plan a better yard. A simple, honest look at how you live is usually enough.
Step 1: Watch how you use your yard now
Spend a week or two just noticing patterns:
– Where do you walk most often?
– Which door do you actually use daily?
– Where does the sun hit in morning and evening?
– Which spots stay damp or muddy after rain?
You might feel tempted to skip this, but it shapes every other decision.
Step 2: Pick your top two or three priorities
If you try to do everything at once, the design can become messy and expensive. Choose a small number of main goals.
Common examples:
– A usable back patio for eating outdoors
– A clear, welcoming front walk and entry
– Fixing a steep slope that is hard to mow
– Creating a play area for kids that is not all mud
Write them down. When new ideas pop up, check them against that list. If they do not support your main goals, maybe they belong in a later phase.
Step 3: Map out rough shapes and sizes
Take a simple site plan, or even graph paper, and sketch:
– The house outline and existing hard surfaces
– Property lines
– Trees, sheds, and other fixed features
– Rough patio and path shapes
You are not drawing art. You are checking how much space you have and how new features relate to doors, windows, and views.
If drawing is not your thing, walk the area and use a garden hose or ropes on the ground to mark shapes. Then step inside the lines and see how it feels.
Step 4: Think about phases and budget
You do not need to build everything in one year. In fact, many Appleton homeowners break projects into 2 or 3 phases. The key is to plan them together so phase two does not undo phase one.
A simple way to think about phasing:
| Phase | Focus | Examples |
|---|---|---|
| 1 | Access and structure | Main patio, primary walk, major grading and drainage |
| 2 | Comfort and use | Seat walls, fire pit, secondary paths, lighting rough-in |
| 3 | Refinement | Planting beds, edging, decorative features |
This way, you set the bones first, then add the nicer details later when time and money allow.
Common mistakes in Appleton hardscaping and how to avoid them
You do not have to be perfect, but avoiding a few frequent errors can save real money.
Ignoring base prep
Many DIY projects fail because people underestimate the base.
Signs of weak base prep:
– Pavers rocking under your foot
– Edges tipping outward
– Steps that settle or tilt
For patios and walks here, a common guideline is 4 to 8 inches of compacted gravel under pavers, more for driveways. That means excavation, not just sprinkling sand on top of soil.
If you are not comfortable with that level of digging and compaction, it might be the point where you bring in a professional installer, even if you do other parts yourself.
Choosing trendy patterns over long term comfort
It is easy to fall for a pattern or color that looks fresh today. In a few years, some trends age poorly.
Ask yourself:
– Will I still like this in 10 years?
– Does this pattern make the area look too busy?
– Will this color hide dirt, salt, and normal wear?
Often, simpler looks last longer. You can still add personality with plants, furniture, and décor, which are easier to change.
Forgetting shade and wind
Wisconsin summers are short, but direct afternoon sun can be harsh. Likewise, some yards are very windy.
Think about:
– Positioning patios where afternoon shade from the house or trees helps
– Adding a pergola or shade sail if your yard is very open
– Using walls, shrubs, or fences to block strong winds in sitting areas
You will use your outdoor space more if it feels comfortable from June through September, not only on perfect days.
Not planning for lighting
You do not need full lighting right away, but it helps to think ahead.
Simple lighting ideas:
– Low path lights for safety along walks
– Wall or step lights on stairs and grade changes
– A few accent lights on focal trees or features
If you are pouring concrete or laying pavers, consider running conduit or low voltage wire paths while everything is open. Adding them later can be more disruptive.
Blending hardscaping with plants in an Appleton yard
Hardscaping alone can feel stiff. Plants alone can feel messy or hard to maintain. The best outdoor spaces mix the two.
Think of hardscaping as the skeleton of your yard and plants as the muscle and skin that bring it to life.
Again, this is not about fancy design theory. A few simple ideas go a long way.
Use plants to soften edges
Hard edges where a patio meets lawn can feel abrupt. Narrow planting beds along key edges solve that.
You can:
– Plant low shrubs or perennials along seat walls
– Add narrow beds along house foundations or fences
– Use groundcovers near steps to break up large hard areas
Choose plants that handle Appleton winters and match how much time you want to spend on care. Many people prefer low maintenance shrubs and perennials mixed with some seasonal color in pots.
Frame views and screen less attractive areas
Instead of trying to hide everything, decide what you want to see from your patio or main windows.
Examples:
– Frame a view toward a favorite tree with a path and bed
– Use taller shrubs or ornamental grasses to hide air conditioners or trash bins
– Add a trellis or small privacy panel where neighbors are very close
You do not need a solid wall to create privacy. Partial screens and angled layouts can make a big difference.
Respect snow storage and melt patterns
Plants near driveways and walks need to handle snow piles and meltwater. Avoid delicate shrubs where you regularly dump snow. Salt tolerant plants near the street or sidewalk are also helpful.
In Appleton, many homeowners are surprised how often plants near the driveway suffer, not from cold air, but from heavy snow and salt spray.
Working with a hardscaping pro in Appleton
You can do parts of your project yourself, or hire a contractor for all of it. There is no single right choice, but a bit of structure in how you approach it helps.
What to ask before you hire
If you talk with a local contractor, consider asking:
– How many years have you been doing hardscaping in this area?
– What kind of base and drainage methods do you use?
– Can you show photos of projects at least 3 to 5 years old?
– Who will be on site each day, and who is my contact person?
– What is your process if something settles or cracks later?
You want someone who understands local soils, codes, and winters, not just someone who owns a skid steer.
Contracts and expectations
Ask for a written scope that lists:
– Materials and brands
– Base depths and installation methods
– Any included drainage work
– Start and estimated finish dates
– Payment schedule tied to milestones
This is not about distrust. It is about avoiding confusion. Outdoor projects are noisy, messy, and weather dependent. Clear expectations make it less stressful.
Where DIY fits well
If you enjoy hands-on work, some parts of hardscaping are good DIY candidates:
– Simple gravel paths
– Small garden walls under 2 feet
– Stepping stone paths through beds
– Mulch and plantings around finished hardscapes
The heavy structural work, like large retaining walls, complex patios, and drainage, is where mistakes cost more.
Year round care for hardscaping in Appleton
A little care each year keeps hardscapes looking decent for longer.
Spring tasks
– Inspect for settling, heaving, or loose units
– Sweep and top up polymeric sand in paver joints if needed
– Clean off winter salt, dirt, and debris
– Trim plants that encroach on paths and steps
Some stains on concrete or pavers need specific cleaners. Read product labels carefully for your surface type.
Summer and fall
– Keep joints and cracks free of weeds
– Check drainage during heavy rains to catch issues early
– Plan sealers for certain materials if recommended by the installer
– Cut back overgrown plants that make paths feel crowded
Before winter, remove items that might rust or stain surfaces, and check that snow removal routes are clear.
Winter habits
– Use non damaging de-icers on pavers and decorative concrete
– Shovel promptly to reduce ice buildup
– Avoid metal shovels on delicate edges where possible
You will never keep everything perfect, but this light care slows wear and avoids bigger repairs later.
Example layouts for real Appleton yards
Sometimes abstract advice is hard to picture. Here are a few simple layout ideas that often fit local homes.
Small city lot
Features:
– A compact 10 x 12 ft patio right off the back door
– A straight 4 ft wide path from driveway to back door
– A few raised planters or beds along the fence
– A small gravel pad in a back corner for a fire bowl
This keeps things functional without filling the whole yard with hard surfaces.
Typical suburban lot
Features:
– A 14 x 18 ft main patio with room for table and chairs
– A small lower level seating zone a step down, closer to the yard
– Curved planting beds framing the patio edges
– A clear, simple front walk from driveway to door, with low lighting
Hardscaping shapes the space, while plants soften it and add privacy.
Sloped backyard
Features:
– A lower patio, level with the yard, for games and kids
– A short retaining wall creating a mid level terrace
– Steps connecting house, terrace, and lower yard
– Plantings on terraces to hold soil and add interest
This approach turns a tricky slope into usable layers, instead of fighting to mow a steep hill.
Questions Appleton homeowners often ask about hardscaping
Is hardscaping worth the cost in a cold climate like Appleton?
If you pick the right features and build them well, yes. A usable patio or better front entry adds daily comfort, not just resale value. The key is to match projects to how you actually live, not to what looks impressive in pictures.
How long should a good hardscape last here?
With solid base prep, drainage, and quality materials, many patios and walls last 20 years or more before needing major work. Minor settling can happen earlier but is often fixable. Quick, cheap installs tend to show problems within a few winters.
Do I need permits for patios and walls in Appleton?
Rules vary by city, structure height, and distance from property lines. Small at grade patios often do not need permits, but taller retaining walls, decks, and structures might. It is wise to check with your local building department or ask your contractor before you start.
Should I build the patio first or plant trees and beds first?
Most of the time, hardscaping comes first. Heavy equipment and excavation can damage new plants, and you want grading and drainage set before planting. You can still plan plant locations on paper and protect existing trees during construction.
Is a fire pit safe on a wood deck in this area?
In general, an open fire directly on a wood deck is not a good idea. Radiant heat and embers can damage or ignite the deck. If you want a fire feature on a deck, look at gas units designed for that use and follow all clearance rules, or place the fire feature on a dedicated patio instead.
How do I know if my yard needs a retaining wall?
You might need a wall if:
– You have a steep slope close to the house
– Soil keeps washing out during storms
– You want to create a flat area where there is none
A slight slope can often be handled with graded soil and plants. For anything steeper or taller, a wall or terrace system gives more stability.
What is the smallest project that still makes a big difference?
Often, it is a better front walk and entry. Widening a narrow path, fixing cracks, and adding simple plantings near the door can change how your whole home feels, and it improves daily use every single day, not only when you host people.
If you stand in your yard right now and had to pick just one area to improve, where would you start, and what is the one hardscape change that would help you use that area more often?
